|
|


|



Title: Use Pygame to animate a hypotrochoid in Python
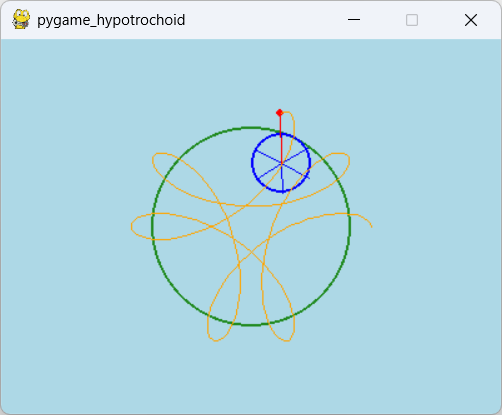
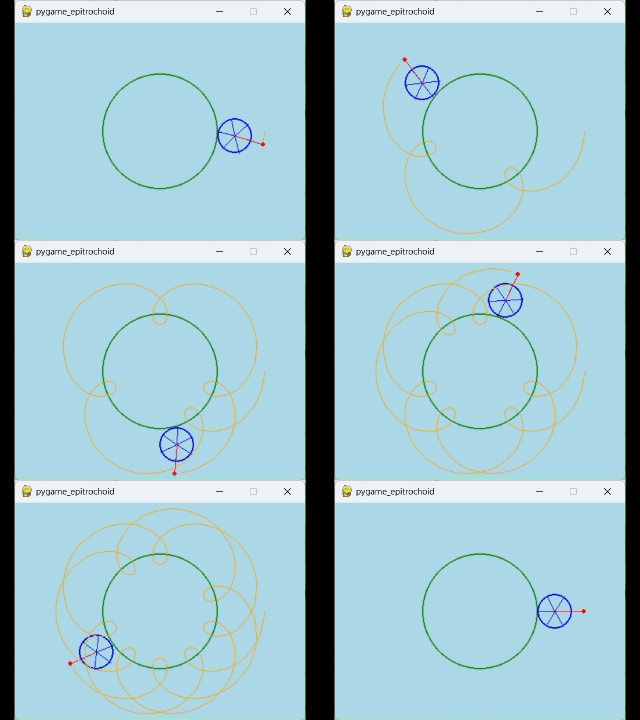
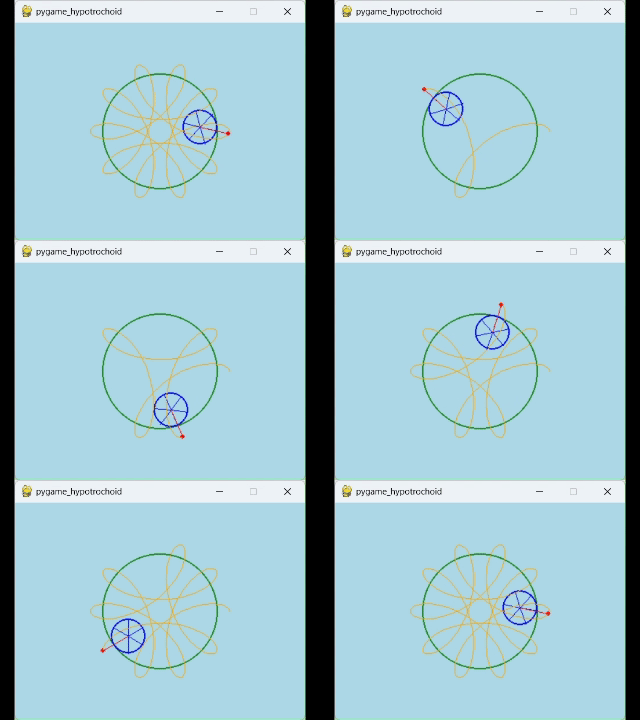
My post Use Pygame to animate an epitrochoid in Python explains how to use Pygame to animate the construction of an epitrochoid. This example does the same for a hypotrochoid. Drawing Hypotrochoids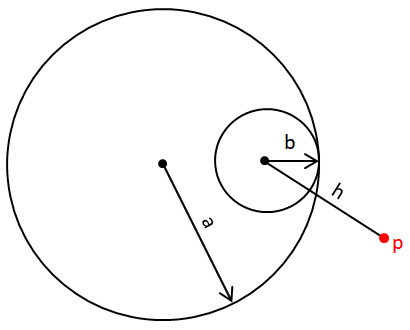 My post Draw a hypotrochoid (Spirograph curve) in Python explains how to draw a hypotrochoid, but basically you rotate a circle around the inside of another circle while tracing out the path of a point attached to the moving circle as shown in the picture on the right. If you compare this method to the one you use to draw an epitrochoid, you'll see that they're very similar. The only difference is that the moving circle rotates inside the fixed circle in a hypotrochoid while it rotates around the outside of the fixed circle in an epitrochoid. You can even use the same parameters a, b, and h to represent them both. The following animations show how you draw an epitrochoid (left) and a hypotrochoid (right).
Updating the CodeThe similarity between the two curves means the code in this example is almost identical to the earlier one. You only need to make three very small changes.The first two changes are in the draw method shown in the following code with the changes highlighted in blue. def draw(self, t): '''Draw the current state of affairs.''' self.surface.fill(self.bg_color) # Draw the stationary circle. pygame.draw.circle(self.surface, self.inner_circle_color, self.center, self.a, width=2) # Draw the inside circle. dist = self.a - self.b cb = self.center + Vector2.from_polar((dist, math.degrees(t))) pygame.draw.circle(self.surface, self.outer_circle_color, cb, self.b, width=2) # Draw spokes on the outer circle. tb = -t * self.a / self.b for phi in range(0, 360, 60): spoke_pt = cb + Vector2.from_polar((self.b, phi + math.degrees(t + tb))) pygame.draw.line(self.surface, self.outer_circle_color, cb, spoke_pt, width=1) # Draw the line and point. p = cb + Vector2.from_polar((self.h, math.degrees(t + tb))) pygame.draw.line(self.surface, self.point_color, cb, p, width=1) pygame.draw.circle(self.surface, self.point_color, p, 3) # Draw the curve. points = get_hypotrochoid_points( self.center, self.a, self.b, self.h, 0.05, t) if len(points) > 1: pygame.draw.lines(self.surface, self.curve_color, closed=False, points=points) First, if you look at the picture showing the circles' measurements, you can see that the distance between the centers of the two circles is a - b instead of a + b as it is for an epitrochoid.Second, when you're drawing an epitrochoid, the moving circle rolls clockwise around the stationary circle. In a hypotrochoid, the moving circle rolls counterclockwise. (See the animations.) That means the angle by which the moving circle rotates is the negative of the rotation in an epitrochoid: tb = -t * self.a / self.b. The last change is basically the same as the second one: reversing the sign of the moving circle's angle of rotation. This time it appears in the hypotrochoid_point function. def hypotrochoid_point(center, a, b, h, ta): '''Calculate the coordinates for a point on the hypotrochoid.''' tb = -ta * a / b cb = center + Vector2.from_polar((a - b, math.degrees(ta))) p = cb + Vector2.from_polar((h, math.degrees(ta + tb))) return p Those are the only real changes!ConclusionBecause the epitrochoid and hypotrochoid curves are so similar geometrically, the two programs only hold three tiny changes.Download the example to experiment with it and to see additional details. |